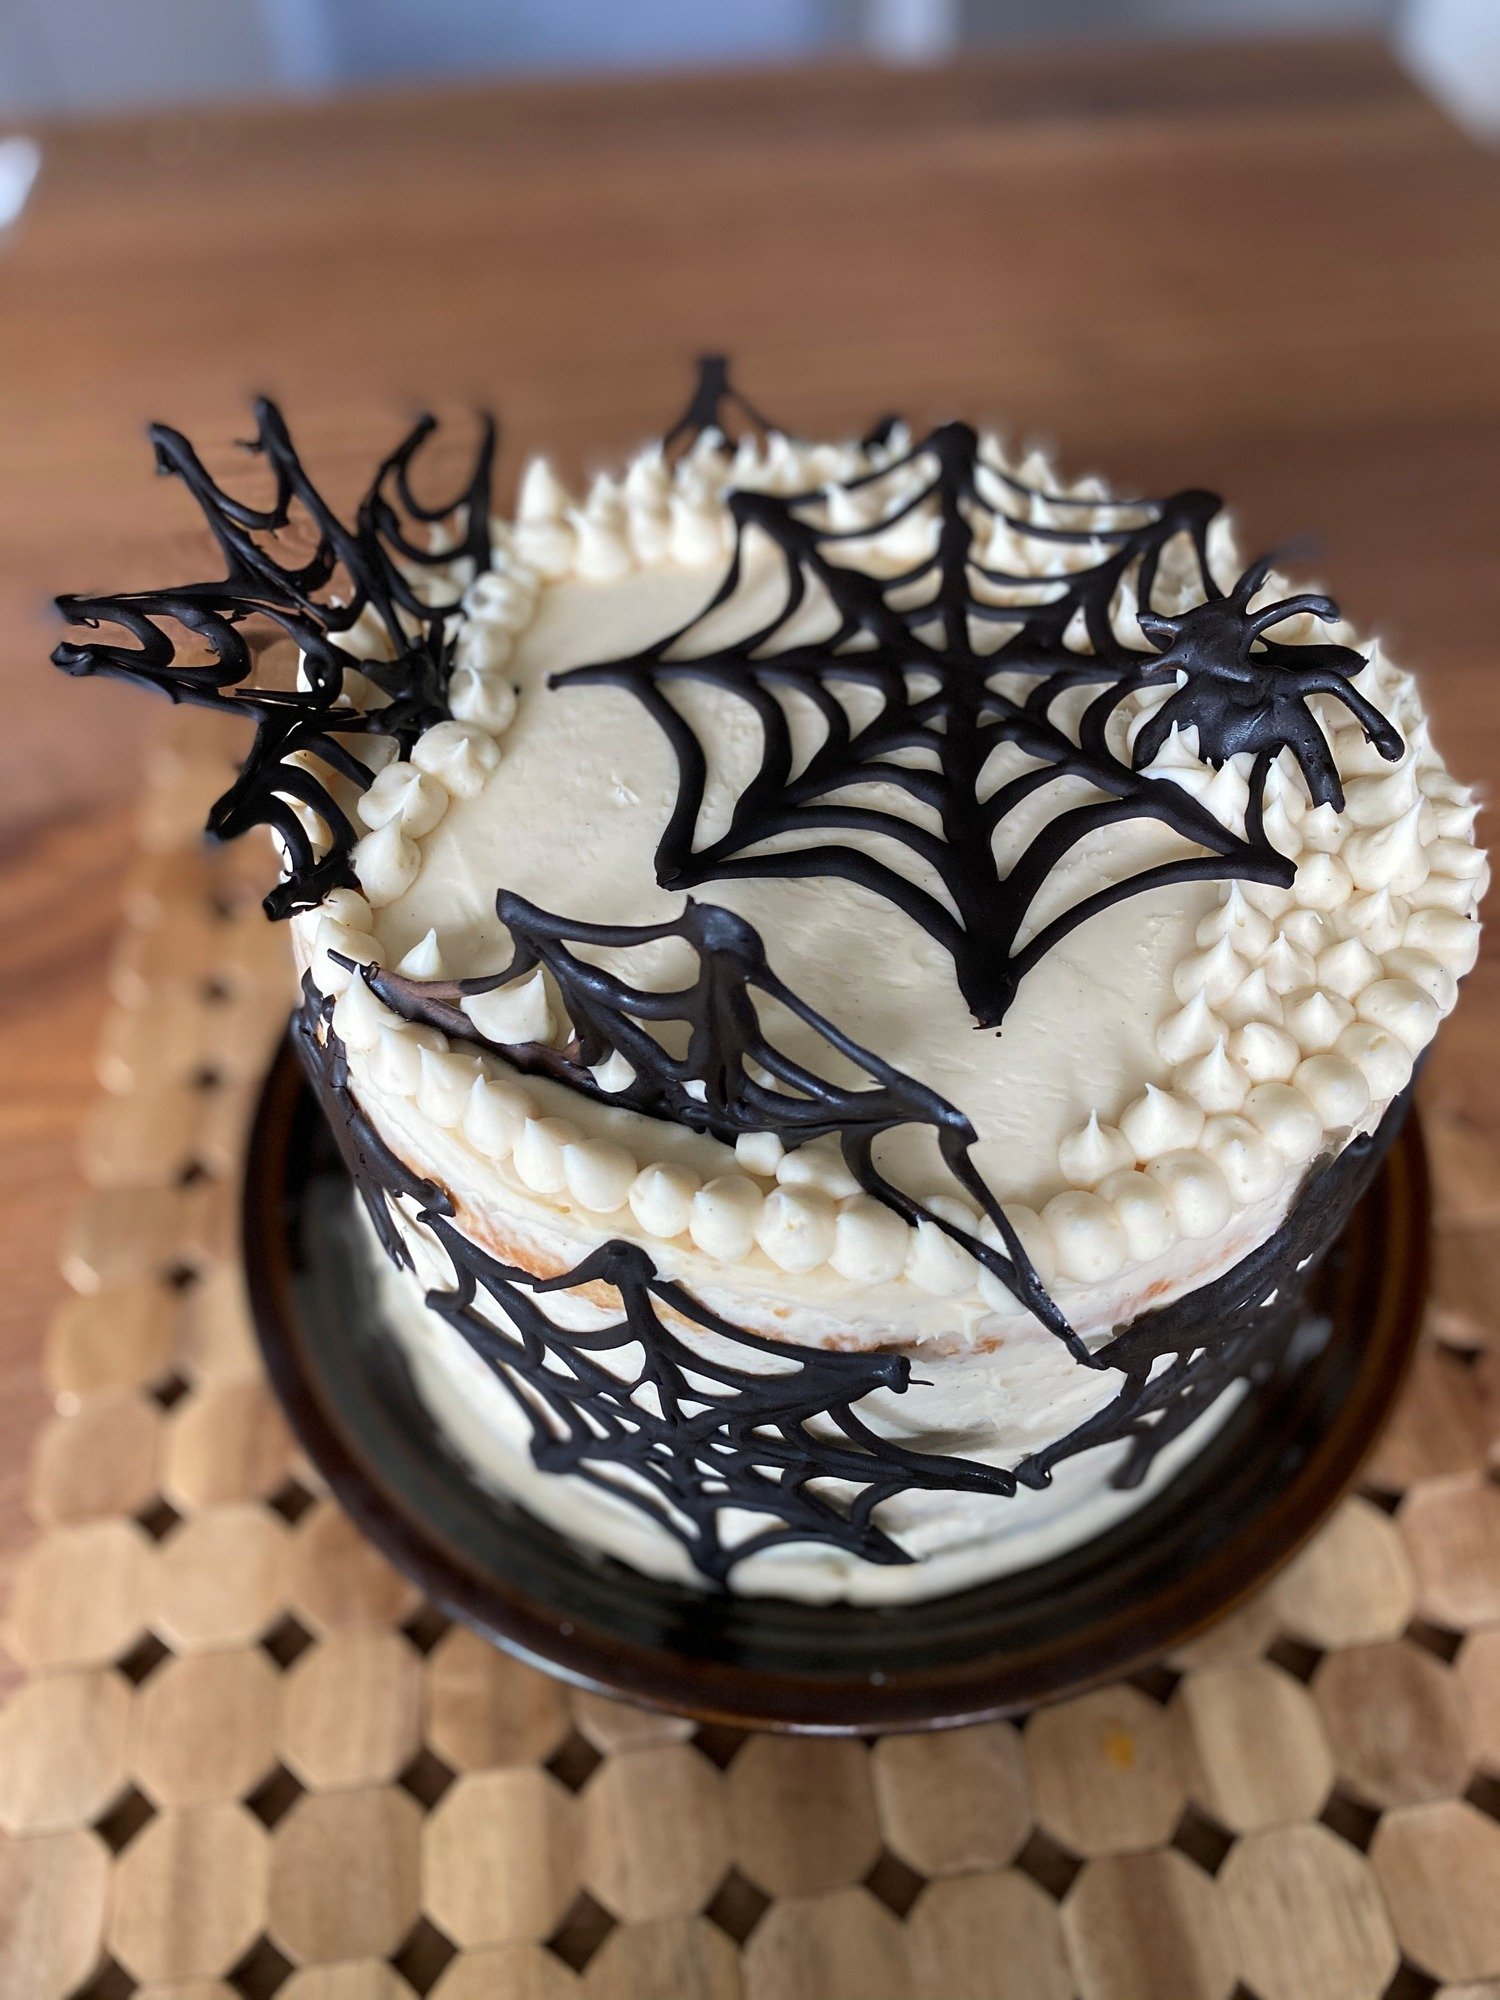
A chocolate spiderweb cake, an even easier Jack Skellington cake, and a very useful box of cake mix.
My kids’ birthdays fall in October, so around here, birthdays and Halloween tend to get a little intertwined. Some years that means a costume. This particular year, it also meant two cakes that looked considerably more ambitious than the process of making them.
Which is my favorite kind of cake decorating. I want the birthday cake moment. I do not necessarily want a second job in fondant.
The spiderweb cake starts with a box mix and gets its personality from chocolate webs piped onto parchment. The Jack Skellington cake is simpler still: one cake round, white buttercream, and a tube of black decorating gel. My son was obsessed with The Nightmare Before Christmas and dressed as Jack that year, so the cake was a pretty easy decision.
Neither required perfect piping. The kids could help draw and pipe the webs and spiders, and the slightly wonky ones fit the occasion beautifully. Finally, a decorating theme with reasonable expectations.
The spiderweb cake: what you need
- Enough cake batter for two 8-inch rounds, following your chosen mix’s yield and pan directions
- The eggs, oil, or other ingredients your mix calls for
- Milk in place of the water, if you want to use my usual swap
- A little vanilla bean paste, optional
- White buttercream: enough to fill, cover, and pipe decorations on an 8-inch two-layer cake
- Chocolate chips or melting chocolate for the webs and spiders
- Parchment, a pencil, a baking sheet, and a small food-safe piping bag or sandwich bag
- An offset spatula and a piping bag fitted with a piping tip for the buttercream
Shopping note: Product links below are affiliate links; I may earn a commission at no extra cost to you.
I have two of these 8-inch springform pans, and switching from classic cake pans has saved me a lot of headaches—and a lot of cake chunks left behind in the pan. Being able to release the sides makes getting the layers out so much easier. The link is for one pan; I use two for this cake.
1. Start with a cake mix
I like Trader Joe’s vanilla bean cake mix, but this is not a cake that depends on one specific box. Use a mix you like and follow its instructions for the ingredients, pan preparation, baking temperature, and baking time.
My usual little upgrades are swapping milk for the water and adding some vanilla bean paste. They make a box cake feel a bit more homemade without asking me to become a different person on a birthday week. Vanilla bean paste is optional; there is no need to buy a jar just to make this cake.
Bake two 8-inch rounds and let them cool completely before frosting. Check the box’s yield first: not every mix makes the same amount of batter. If your mix does not make enough for both rounds, prepare the amount it calls for rather than stretching it into two very thin cakes.
2. Draw the webs before you pipe them
While the cakes bake or cool, sketch a few webs on parchment. This was a good part for the kids to take over. A few crossing lines with little curved connections between them gives you a perfectly usable guide. Draw several sizes for the top and sides of the cake.
Turn the parchment over before adding chocolate. You should be able to see the pencil guide through the paper, with the marks on the underside and the chocolate on the clean side. Set the parchment on a baking sheet so you can move everything into the fridge without carrying a floppy sheet of chocolate art across the kitchen.
Parchment sheets make the setup easy, but a piece from a roll works too.
3. Melt the chocolate gently
Use chocolate chips or melting chocolate and follow the package’s melting directions. Work in a completely dry, microwave-safe bowl. Short heating bursts with a good stir in between give you much more control than one long blast.
If you are unsure, start conservatively with 15–20 seconds, stir, and use shorter bursts as it softens. Stop when a few little pieces remain and stir to finish melting them. You want smooth, pipeable chocolate, not a very hot bowl that still looks lumpy because nobody has stirred it yet. Microwave strength and the amount of chocolate both change the timing.
These mini semisweet chocolate chips are one option. If you use melting wafers instead, follow their directions; different products do not all behave the same way. Toll House’s melting guide is a useful reference for chocolate chips.
Let the chocolate cool enough to handle comfortably before putting it into a bag. An adult can handle the melting and warm bowl; the kids can join in for the piping once everything is comfortable to hold.
4. Pipe, chill, and peel
Spoon the chocolate into a small piping bag, or use a food-safe sandwich bag once the chocolate is no longer hot. Snip a tiny corner. You can always make the opening bigger; making it smaller again is a less successful kitchen project.
Trace the web guides. Let the lines connect and give them a little thickness so the finished webs have something to hold onto. For a spider, pipe a small body with legs attached. Make a few extras while you have the bag out.
The kids helped sketch the webs and pipe the chocolate. Some lines were thicker, some were wobbly, and a few spiders had their own ideas about anatomy. It was not perfect, and it did not need to be. Once the pieces went onto the cake, it all looked festive.
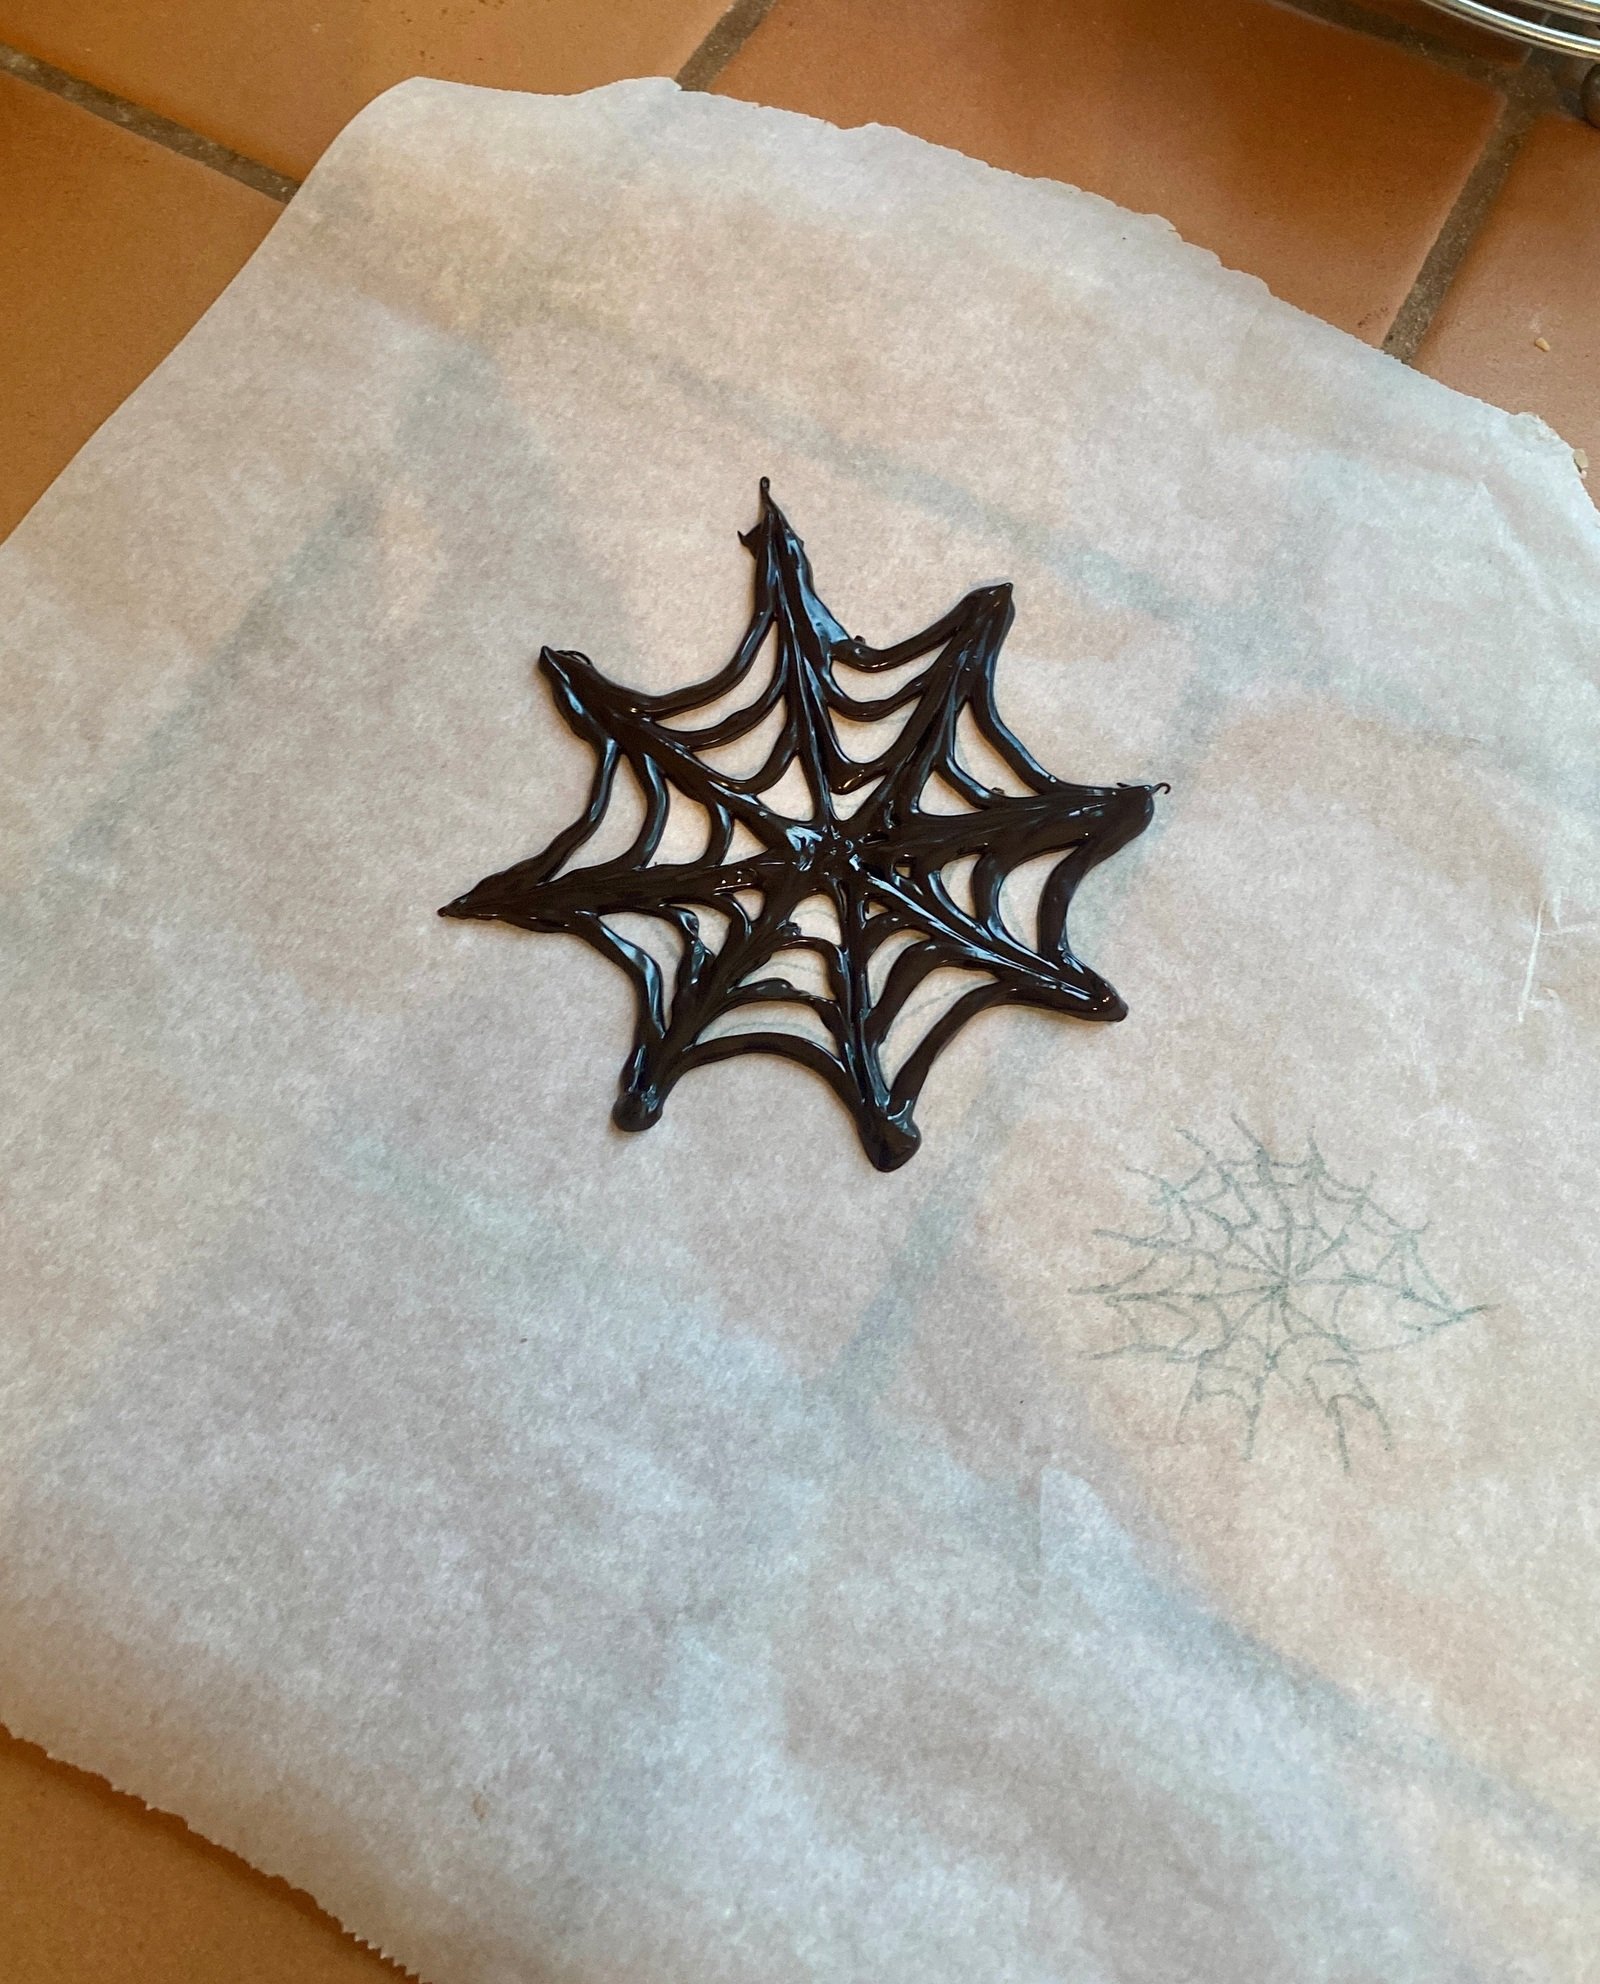
Sketch first, flip the parchment, then pipe on the clean side. The kids helped with the sketches and piping. Wobbly lines are welcome.
Slide the tray into the fridge, or briefly into the freezer, until the chocolate is firm and releases cleanly. The exact time depends on the chocolate and how thick you piped it. Peel the parchment away gently instead of pulling on a delicate web.
Plain melted chocolate can soften again in a warm room. Keep the pieces cool until you are ready to decorate, and avoid handling them more than necessary. Melting chocolate designed for decorations can be a convenient alternative if you want a firmer set without learning to temper chocolate.
5. Stack and frost the cake
Use a simple buttercream you already like. The Kitchn’s basic buttercream recipe is a useful starting point if you need one. Make enough to fill and cover both layers with some left for the piped border; a modest batch may need scaling up for this cake.
Reserve some buttercream for the top. Put a layer of icing between the two cooled cake rounds, stack them, and cover the top and sides with a simple, reasonably smooth layer. An offset spatula helps here. A few spatula marks will not ruin a cake that is about to be covered in spiderwebs.
6. Add the buttercream dollops and chocolate webs
Fit a piping bag with a piping tip, add the reserved buttercream, and pipe small dollops around the top edge. Hold the bag upright, squeeze to make the shape, stop squeezing, and lift. Try a couple on spare parchment first if you want to get a feel for it.
I filled in a crescent-shaped section of the top rather than covering the whole thing. That left room for the webs and meant less piping. Both excellent outcomes.
A piping bag and tip set gives you options, but you only need one suitable tip for this border. Set the firm chocolate webs on top and gently press others into the buttercream on the sides. Add the spiders wherever you like. If one web breaks, a section can still look good tucked into the frosting.
The even easier cake: Jack Skellington
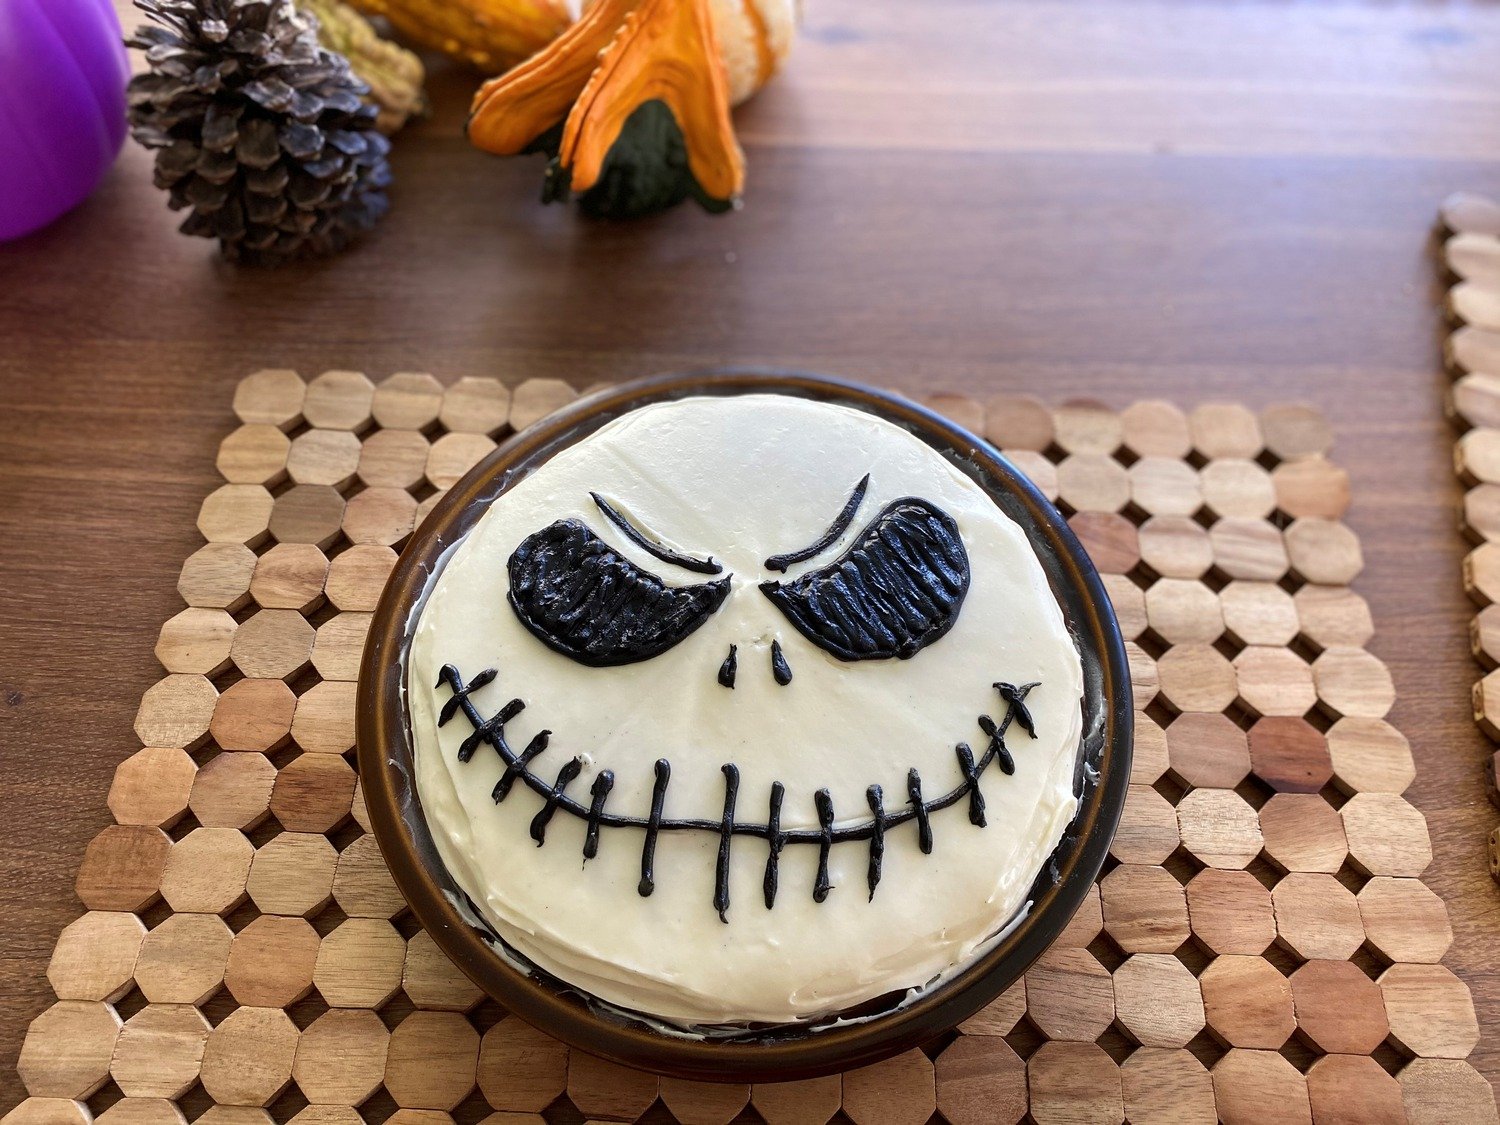
One round, a smooth layer of buttercream, and black gel. That was the whole decorating plan.
The same year, my son’s Nightmare Before Christmas obsession gave me a second cake idea with an even shorter supply list.
Start with one fully cooled cake round and frost it with white buttercream. Smooth the top with the offset spatula, then use black decorating gel to draw the face: the large eyes, two small nostrils, and the long stitched smile. I freehanded mine. You could lightly mark the placement with a clean toothpick first if you would rather have a guide.
I used the shortcut of ready-made black gel instead of making black icing. This black sparkle decorating gel is the linked option; it has a shimmer, so it is worth knowing that if you prefer a matte finish. Outline the larger shapes first, then fill them in and add the little stitches across the smile.
That is it. No sculpted cake, no fondant head, and no attempt to recreate the entire movie in buttercream. The birthday child recognized his favorite character, which was the point.
The part I would do again
Make the decorative pieces away from the cake. Parchment gives everyone a place to try things, and a few spare webs take the pressure off. Then use a cake mix and whatever other shortcuts make the project fit your week.
These cakes looked festive and a little dramatic, but the process stayed manageable. In a month already trying to fit in birthdays and Halloween, that is a decorating standard I can happily get behind.
About the shopping links
Some links in this article are affiliate links. If you make a qualifying purchase, Modern Nesting may earn a commission at no additional cost to you. As an Amazon Associate I earn from qualifying purchases. Shopping through these links is optional.